This post contains affiliate links. If you purchase through these links, I may earn a small commission at no extra cost to you.
It was day ten. The baby was sleeping on my chest and I was doing the math, panicking. Two weeks. That’s the window everyone talks about. The tiny curled-up stage, the one where they still look like they just arrived from wherever babies come from. And I hadn’t booked a photographer. Hadn’t even thought about it before the birth, honestly. Now suddenly I was spiralling at midnight about missing it forever.
Here’s the thing: you do not need a photographer to get beautiful newborn photos. You need natural light, a safe surface, and about an hour when your baby is in a deep sleep. That’s it. This guide gives you everything else, from the exact poses that work to the iPhone settings that make a real difference. Save it. You have time.
When to Do Newborn Photos at Home
Days 5 through 14 is the golden window for a newborn DIY photoshoot, and there’s a simple reason for it. In the first two weeks, newborns still sleep deeply and for long stretches, and they naturally curl their bodies the way they were positioned in the womb. After about two weeks they start to unfurl, become more alert, and fight sleep more actively. That sleepy, fist-tucked, perfectly compact look you see in your favourite newborn baby photography ideas online? That’s the first two weeks.
If your baby is already past two weeks, don’t panic. You can still take beautiful photos. The poses shift slightly, that’s all. You’ll lean toward awake-and-alert shots rather than sleeping poses, and those are just as precious in their own way.
A practical note before you start: this guide walks through everything you need for a successful DIY baby photo shoot at home, but if you want a quick overview of what to gather before you begin, grab the full newborn photo checklist. It saves you from the mid-session scramble of realising you forgot to grab the second wrap. And if you want to map out your whole newborn week, a simple newborn schedule can help you predict the long sleep windows when photos are easiest.
[BREVO-FORM-PLACEMENT: Free Newborn Photo Checklist]
What You Actually Need (and What You Don’t)
Let’s get this out of the way first. The newborn photoshoot ideas at home that rack up tens of thousands of saves on Pinterest? Most of them were taken with a phone, a window, and a plain blanket. The setup is genuinely simple.
You do not need a DSLR camera. You do not need an expensive photography backdrop. You do not need a ring light, a studio, or a prop collection that cost $200. What you need is:
- Good natural light. A north-facing or east-facing window is ideal because the light is soft and diffused rather than harsh and direct. Bright but not sunny is what you’re going for. Mid-morning tends to work well. Harsh afternoon sunlight streaming straight in creates deep shadows and blows out delicate skin tones.
- A simple surface to work on. A firm couch cushion, a changing pad covered with a soft blanket, or the floor next to the window all work well. You don’t need a beanbag (and please don’t use an unsupported beanbag anyway, more on that in the safety section).
- A soft neutral wrap or blanket. Cream, white, grey, sage. A simple muslin swaddle in a neutral colour is all you need for most newborn baby props setups.
- Your iPhone. Portrait mode changed everything for phone photography of newborns. Use it.
That’s the whole list. Everything else is optional. The newborn baby photoshoot ideas that look the most timeless are almost always the simplest ones.
Easy Newborn Poses at Home (Safe for Parents)
This is the core of the guide. These are simple newborn photos that any parent can set up safely, without training, without a spotter beyond your partner, and without any specialised equipment. Work through them during one deep sleep cycle, and you’ll have more than enough images.
A quick note before you start: always have a second adult present when attempting any pose, keep one hand on or near your baby at all times, and never force a position. If your baby resists a pose, skip it. Forcing creates crying and unsafe situations, and the best photos happen when the baby is comfortable and settled.
For a full breakdown of each pose with step-by-step setup instructions, the newborn poses cheat sheet for parents is worth bookmarking alongside this guide.
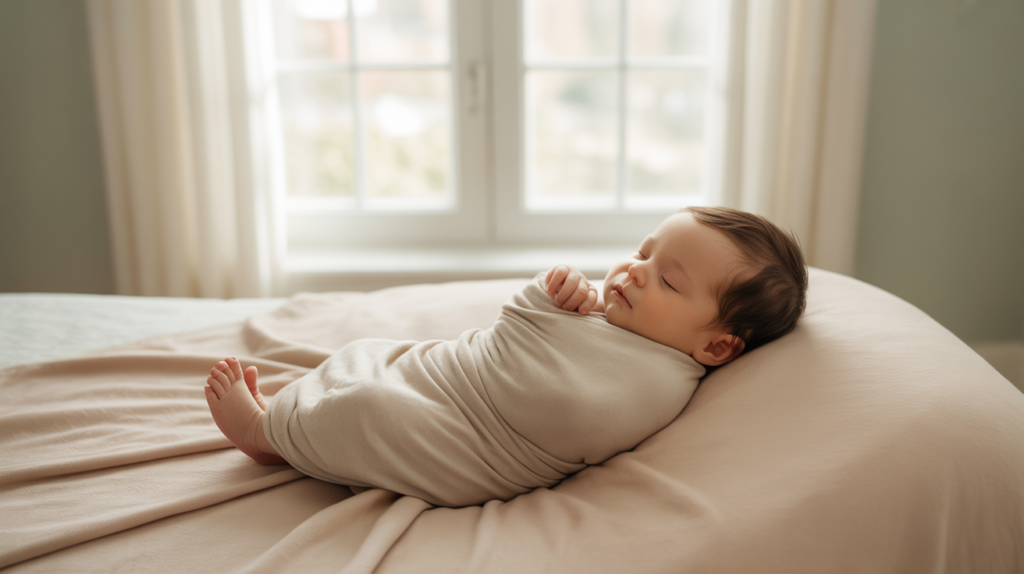
Wrapped Sleeping Pose
This is the most foolproof newborn baby photography at home DIY option for new parents. Swaddle your baby snugly in a muslin wrap, lay them on a soft flat surface near the window, and let them settle completely before you shoot. The wrap does all the work of creating that tidy, photogenic look. Get level with the baby rather than shooting down, and shoot the face from a slight angle rather than straight-on.
Safety note: baby must be lying flat on a firm, flat surface. Never leave an unattended sleeping baby in a posed position.
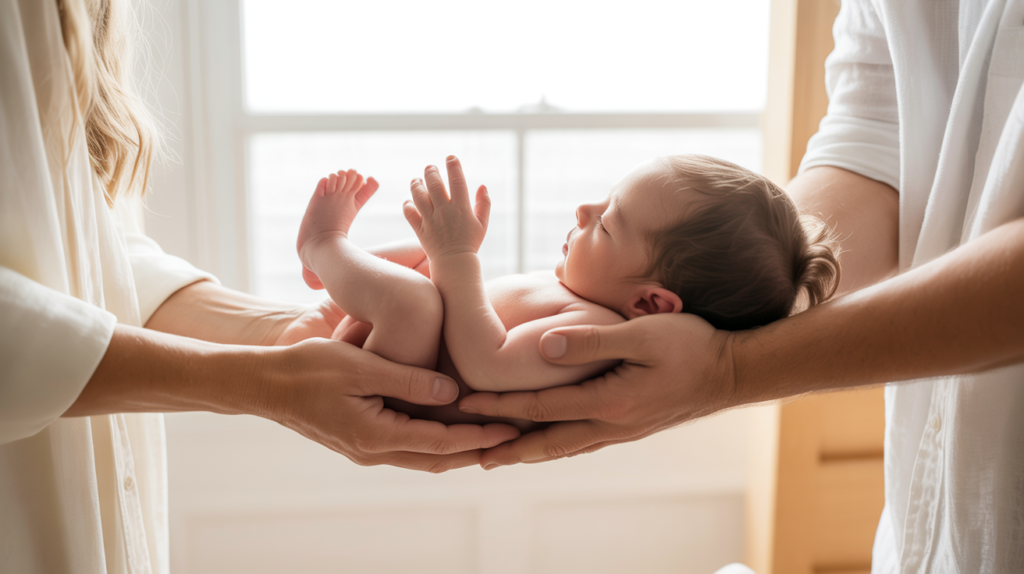
Parent Hands Cradling Pose
This is consistently the pose that makes parents cry when they see it later. Hold your sleeping baby in your cupped hands, resting both your hands on a soft surface so your arms aren’t straining. The contrast of the tiny baby against large parent hands is emotional in a way that a solo baby shot isn’t. It’s also easy to set up for family newborn pictures at home because it naturally shows connection.
Safety note: keep your hands firmly supporting baby’s head and body at all times. Both hands should be in contact with baby throughout.
On the Chest Skin-to-Skin Pose
Have one parent lie back comfortably on a bed or couch. Place the baby on their chest, facing upward slightly. The second parent shoots from above or from the side. This is intimate, natural, and captures the size of the baby beautifully. No wrapping or posing required. The baby does exactly what babies do on a parent’s chest, which is look impossibly tiny and perfect.
Safety note: parent must be fully alert and awake. Never attempt this if you’re sleep-deprived enough to risk dozing off.
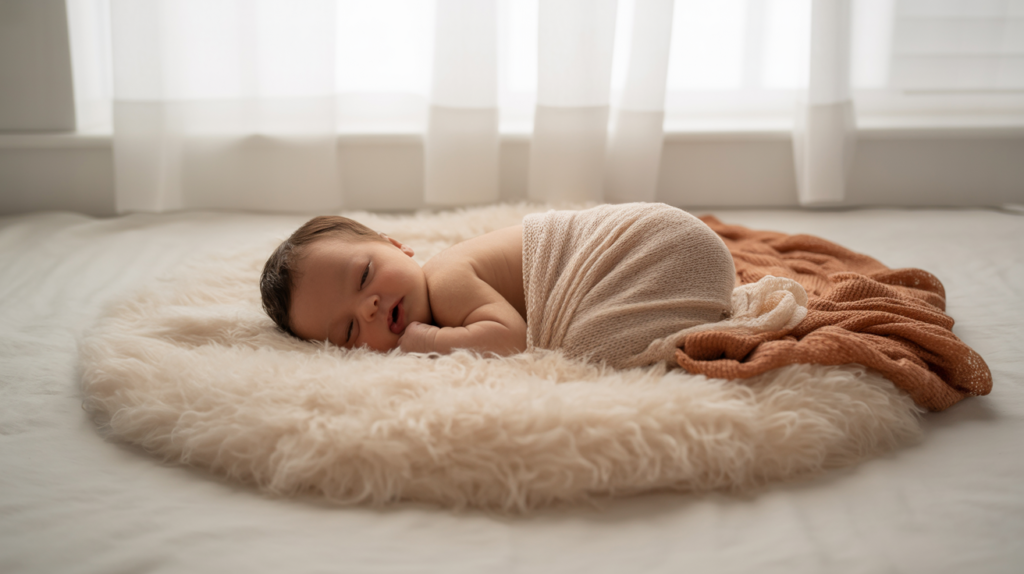
Side-Lying Curled Pose
Lay your baby on their side on a soft surface, gently supporting them with a rolled blanket or folded wrap tucked behind their back. They will naturally draw their knees up toward their chest, re-creating that fetal curl. This pose shows off the whole tiny newborn profile and is one of the easy newborn poses at home that produces the most “how is that baby real” results.
Safety note: always supervise closely. Never leave a side-lying baby unattended, even for a moment.
Sibling Introduction Pose
If you have an older child, a sibling pose is worth the small chaos of organising it. Sit the older sibling comfortably on the couch or floor. Place the newborn in their lap or crook of their arm, with an adult hand just out of frame supporting the baby’s weight. Have them look at the baby rather than the camera. These shots are almost always candid gold.
Safety note: always have an adult hand supporting the newborn’s full weight throughout. The older sibling holds but the adult controls.
Family Newborn Pictures at Home — All Three Together
Position both parents close together, both supporting the baby between them. Shoot from slightly above or have a friend or tripod handle the camera. The logistics are fiddlier but these photos are irreplaceable. You were both there on this exact day with this exact tiny baby. Get it on camera.
iPhone Photography Tips for Newborn Photos
You don’t need to know anything about photography to use these. They work on any recent iPhone model.
- Use Portrait Mode. This is the single biggest upgrade you can make to your newborn shoot at home. Portrait Mode creates a soft blur behind your subject (the bokeh effect) that makes phone photos look closer to professional camera shots. Tap on your baby’s face to focus before shooting.
- Natural light only. No flash. This is non-negotiable for newborn photography. Flash creates harsh shadows and startles sleeping babies. Natural window light is softer, warmer, and far more flattering on newborn skin. If your home is very dark, a ring light on the lowest warm setting is acceptable, but window light is always the first choice.
- Get level with the baby. The instinct is to shoot down from above, but photos taken at baby’s level are consistently more powerful. Get on the floor. Get your phone at baby’s eye level. The difference is significant.
- Burst mode for awake moments. If your baby is having an alert, eyes-open moment, hold down the shutter button to take a burst of shots. You’ll get one or two where the eyes are open and focused, which is worth a hundred blurry single attempts.
- Edit in Lightroom Mobile for free. Lightroom Mobile has a free version that gives you everything you need for newborn photo editing. Lift the shadows slightly, add a touch of warmth, and reduce highlights if the window light is blowing out. Avoid heavy filters. The goal is to enhance the natural light you already captured, not to apply a preset that makes your baby look like a stock photo.
For a deeper dive on phone settings and editing for newborn lifestyle photography at home, the newborn photography tips for parents guide covers these in more detail.
Simple DIY Newborn Photo Props
The truth is the most beautiful newborn pics at home use almost no props at all. The baby, the light, and the wrap are the whole picture. But if you want a few simple additions, here’s what actually works without buying a dedicated prop kit.
- A simple muslin wrap. Cream, white, or sage green. A single neutral swaddle wrap is the one thing worth having. It does double duty as a background and as a wrap.
- A small knit bonnet. This is optional, but a tiny sage or cream knit bonnet adds one small element of warmth and coziness without overwhelming the photo.
- A wicker basket lined with a soft blanket. A small wicker basket (the kind sold for household storage) lined with a folded cream blanket creates a classic newborn baby props setup without the photography-specific price tag. Use it only for awake or lightly sleeping photos where baby is fully supported and you’re right there with your hand underneath.
- A parent’s hands. This is the most used and most meaningful prop in all of newborn photography. Dad’s hands, mom’s hands, both together. The prop is the person. You don’t need anything else.
If you want a more complete collection of simple props, the DIY newborn photo props guide goes deeper on budget-friendly options and what to look for.
What to Dress the Baby in for Newborn Photos
The short answer: less is more. Naked with a soft wrap is the most photogenic option by a wide margin. It shows the baby’s actual tiny body, which is the whole point of newborn baby photography ideas that make people stop scrolling.
If your baby runs cold or you’re not comfortable with a naked-wrap setup, a simple neutral onesie works well. Cream, white, or a pale stripe. Avoid busy patterns, logos, or anything with large text. The outfit should disappear into the photo, not compete with your baby’s face.
For a full breakdown of every option by season, shoot type, and what to avoid, the full guide on what to dress baby in for photos covers everything you need to know before you start shooting.
Are Newborn Photoshoots Safe?
Yes, when you stick to the poses in this guide. The important thing to understand is that many of the poses you see in professional newborn photography online, particularly the curled-in-a-bowl pose, the frog pose, and the hanging-from-a-branch setup, are composite images. They are created by combining multiple shots in editing, and the baby is always fully supported in each individual frame. Attempting these poses without professional training is genuinely dangerous and not something this guide covers.
The poses in this guide are specifically chosen because they are parent-safe. They require no specialised knowledge, no props that elevate the baby, and no positions that compromise the baby’s airway or spinal alignment. If anything feels wrong or your baby is resisting, stop.
For a full breakdown of what’s safe versus what requires professional training, the full newborn photoshoot safety guide is worth a quick read before you start.
Creative Monthly Baby Photos: Keeping the Photo Habit Going
Once you’ve made it through the newborn window, the urge to document doesn’t go away, it just shifts. Creative monthly baby photos are one of the most saved categories on Pinterest, and for good reason. A simple monthly milestone setup, even just a sticker on a onesie and a clean background, creates a visual record of the year that goes by faster than anyone warns you.
Newborn hospital pictures are something a lot of moms regret not taking more intentionally, but from month one onward you have total control. Keep the setup simple. The same spot in your house, the same blanket, the same time of day. Consistency across the months makes the progression powerful.
You’ve already built the skills and found the light in your home from the newborn shoot at home. Monthly milestone photos are just a continuation of the same practice with a slightly older baby.
You Have Everything You Need
Remember that day-ten panic? You have more than you need to capture this stage beautifully. Good natural light. A swaddle wrap. Your phone. A safe surface. And now, this guide.
The newborn window is short. But it is not over yet. Put the baby down near the window during a deep sleep, sit quietly for a moment, and start shooting. You’ll have photos you look at for the rest of your life.